Solving a Starlink Mounting Issue with a Custom Bracket
- Derrin

- Jan 28
- 3 min read
The initial problem was that the provided Starlink mount was too short, causing the dish to hit the side of the building when installed. The mounting arm didn’t extend far enough to allow proper clearance. This issue made it impossible to secure the dish to the building’s exterior wall. To resolve this, a custom bracket was needed to extend the mount outward, providing the necessary clearance for optimal satellite connectivity.

Selecting the Metal for the Custom Mount:
After identifying the issue with the provided Starlink mount, the next step was to visit the welding shop to select the right metal for fabricating an extension bracket. Choosing the correct materials was crucial to ensuring the new mount would be strong enough to support the dish while withstanding outdoor conditions. The selected pieces included a flat steel bar and a square tube section, both of which would be cut, welded, and drilled to create the necessary extension.

Fabricating the Custom Mount:
Once the metal was selected, the next step was to cut, weld, and drill holes to create a sturdy extension bracket. The flat steel plates were cut to serve as mounting bases, while the square tube provided the necessary extension. After welding the pieces together for strength, holes were drilled in precise locations to allow for secure bolting to both the building and the original Starlink mount. The finished product is a heavy-duty custom bracket designed to ensure the dish has proper clearance and stability.

Painting the Bracket for Weather Protection:
With the custom bracket fully fabricated, the next step was to apply a protective coat of paint. This is essential for preventing rust and corrosion, ensuring the bracket remains durable in outdoor conditions. The bracket was suspended to allow for an even coat on all sides, and a spray paint formulated for metal surfaces was used to create a weather-resistant finish. This final touch enhances both the longevity and appearance of the mount before installation.

Installing the Custom Bracket on the House:
With the bracket painted and fully prepared, the next step was securing it to the house. The bracket was mounted using heavy-duty bolts to ensure a strong and stable connection to the exterior wall. Proper alignment was crucial to support the Starlink dish and maintain a level installation. At this stage, the custom bracket is in place, but the dish and original mount have yet to be attached. This setup now provides the necessary extension to prevent the dish from hitting the building, solving the original installation challenge.

Attaching the Original Starlink Mount to the Custom Bracket:
With the custom-fabricated bracket securely installed on the house, the next step was attaching the original Starlink mount. The Starlink mount was bolted to the extended bracket using heavy-duty hardware, ensuring a strong and stable connection. This setup now provides the necessary clearance for the dish to function properly without interference from the building. The combination of the custom extension and the original mount allows for a secure and optimized installation, ready for the final step—attaching the dish.

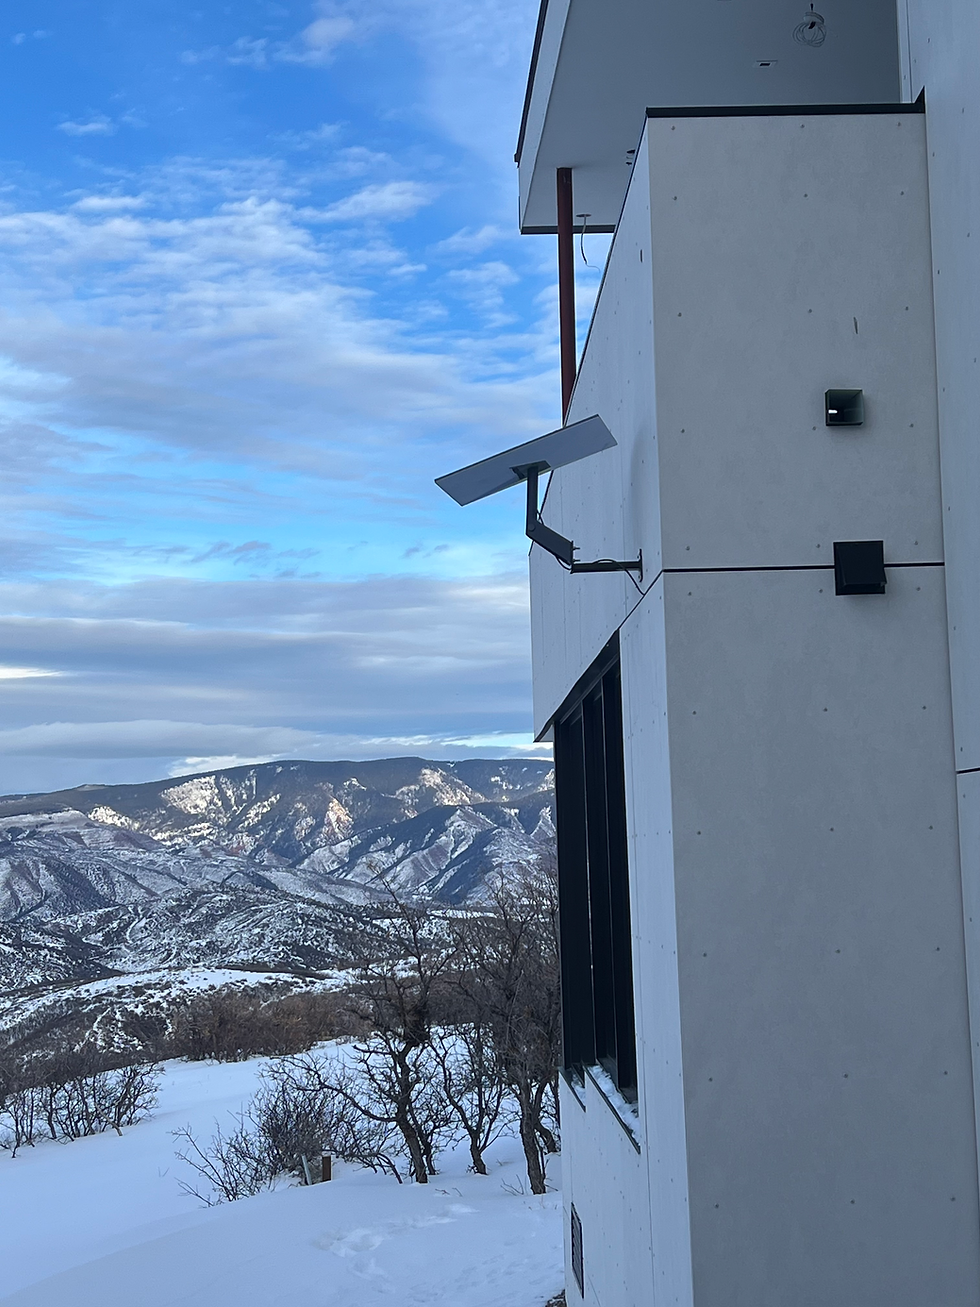
Final Installation of the Starlink Dish:
With the custom bracket and original mount securely in place, the final step was installing the Starlink dish. The dish is now positioned at the correct distance from the house, ensuring it has an unobstructed view of the sky for optimal satellite connectivity. The custom extension successfully prevents interference from the building, solving the original mounting issue. This installation not only enhances the dish’s performance but also maintains a clean and professional look on the home’s exterior.
This project highlights Carelli LLC’s ability to identify challenges and create effective, custom solutions. From problem-solving to fabrication and installation, Carelli LLC offers a one-stop-shop approach for tackling unique construction and modification needs. Whether it’s custom metalwork, home renovations, or off-grid solutions, Carelli LLC brings expert craftsmanship and innovation to every job. If you have a project that requires creative problem-solving and high-quality execution, Carelli LLC is the contractor you can trust.

Comments